Showing posts with label Halloween. Show all posts

Monday, October 31, 2011

Happy Halloween!

Hey Guys! I know Halloween is pretty much over but I've been busy doing Halloween stuff with my kids so didn't get a chance to do a post today, sorry!
Anyways, you're going to see 2 manis today so I think that makes up for it!
The first mani is just a basic spiderweb. I used Kleancolor Metallic Purple and just a basic silver foil polish for the web. I used a paintbrush and painted the web on. Something interesting to note: the Kleancolor polish completely changed color once I put topcoat on!

Kleancolor Metallic Purple

Without topcoat

With topcoat, see how it doesn't look metallic anymore? I personally like it better this way, it turned into a rich glowy deep violet, totally gorgeous!


I played with the white balance to try to show you the true color of the polish. this is pretty close, but it's really rich in real life.


Now for my next mani, I used Kayla Shevonne again as my inspiration. I can't help it, she's awesome!
These are the polishes I used: WnW Black Creme, unnamed pumpkin polish with holographic glitter and crescent moons in a clear base, China Glaze Ghoulish Glow, Essence Lime Up. I also used a bit of yellow mixed with white but I didn't show that.
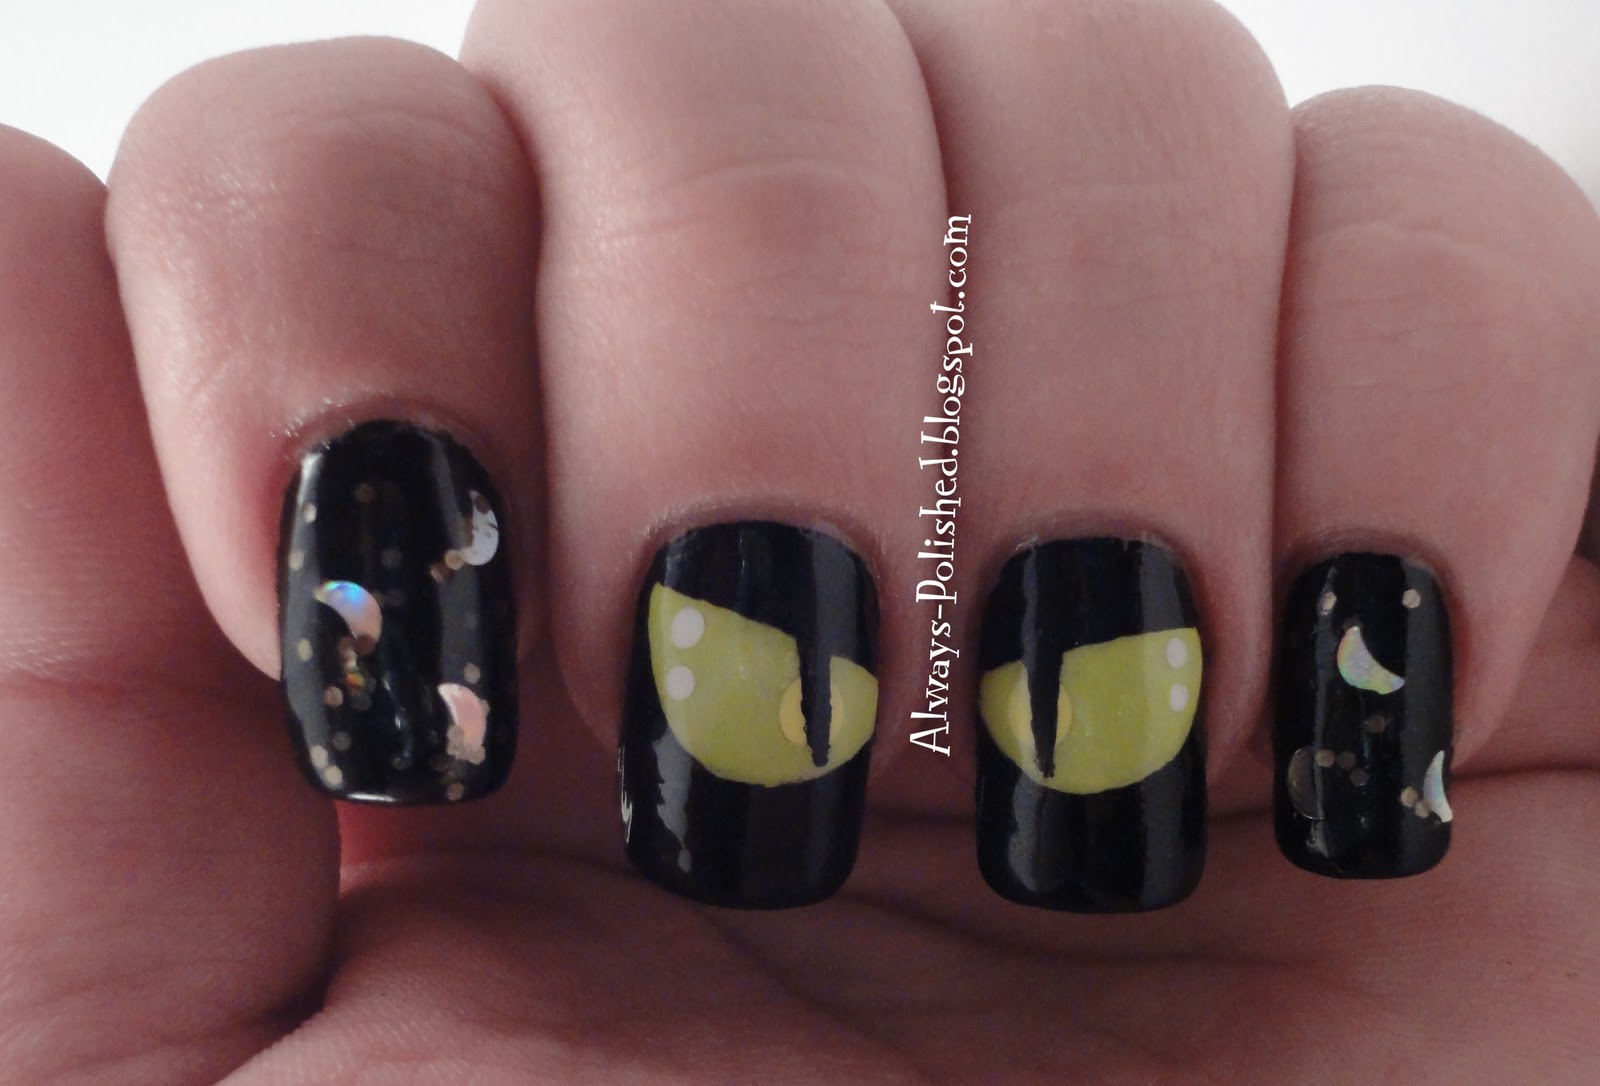
I used the pumpkin glitter polish on my thumb, index and pinky fingers to simulate the night, and the middle and ring fingers have cat's eyes. I followed Kayla's tutorial, and it was actually very easy.
I'm super pleased with how this turned out
And it glows! ahhh I love it so much!
What do you think? did you do anything special on your nails for Halloween?

Sunday, October 30, 2011

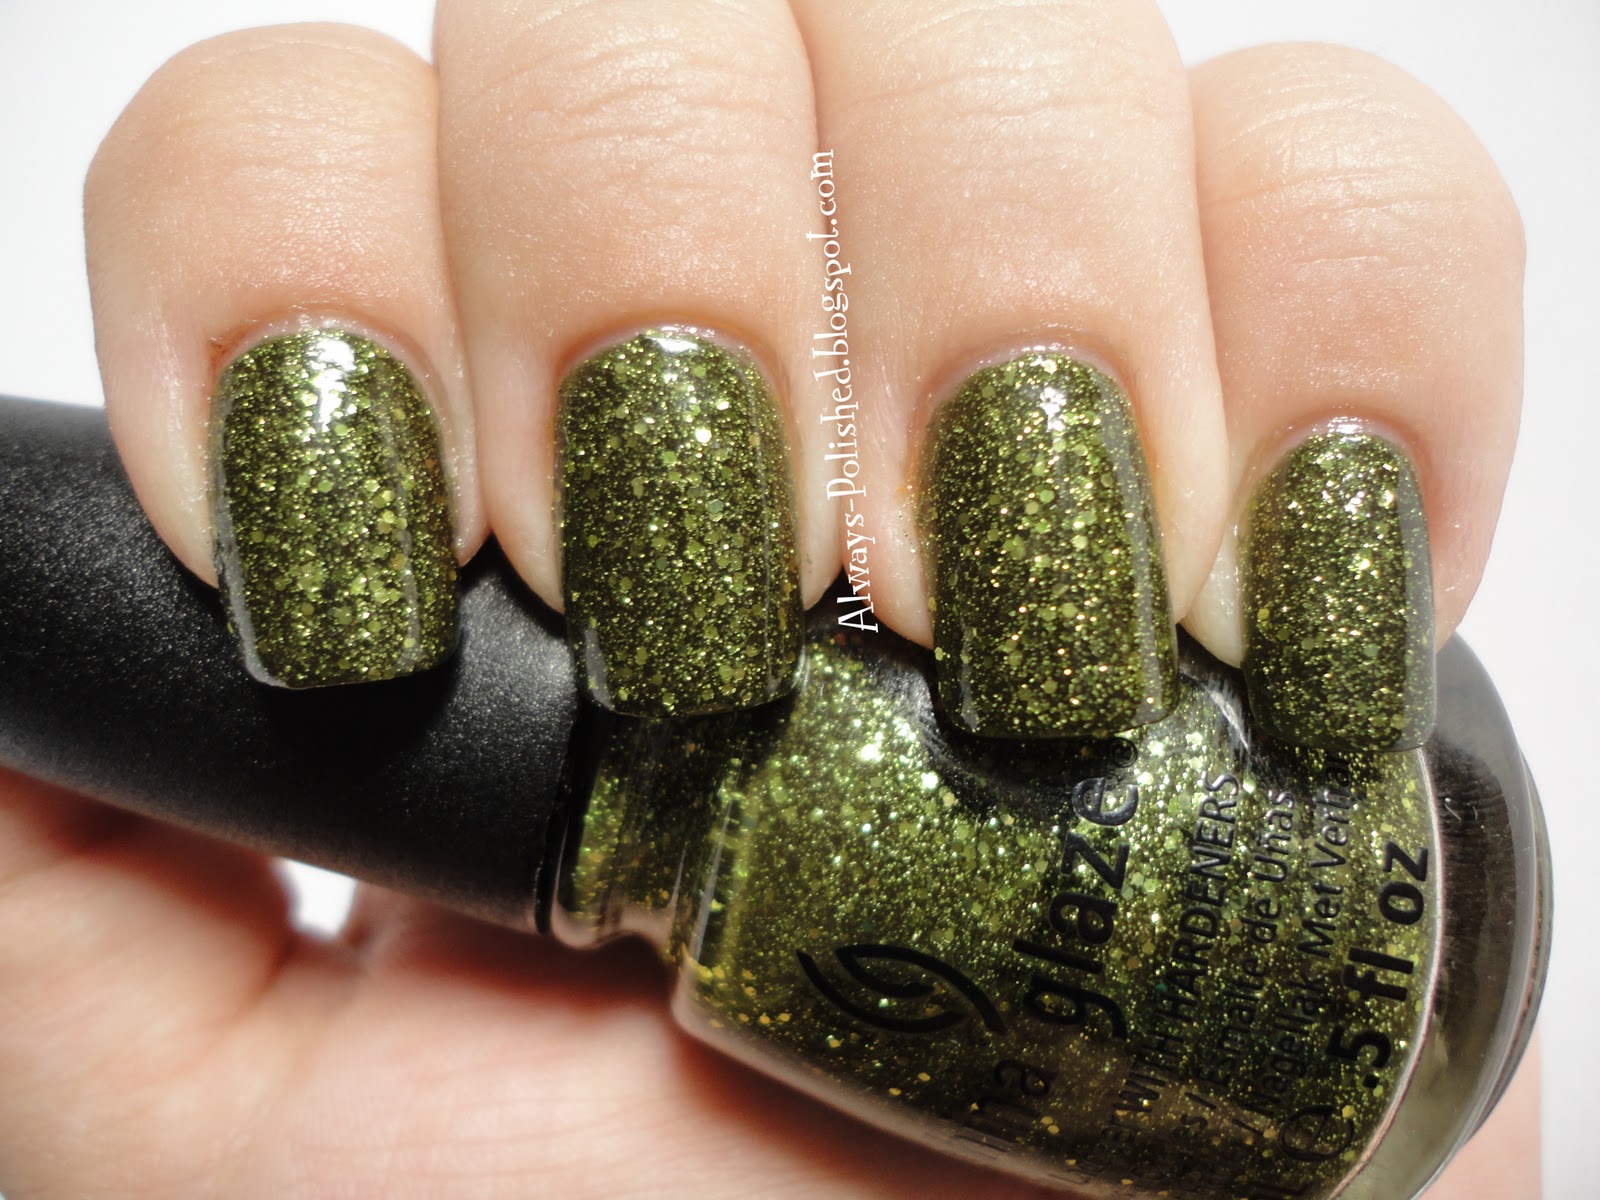
China Glaze It's Alive

Hey Guys, I'm trying to get as much Halloween stuff posted before Monday as possible, so here's a quicky of China Glaze It's Alive. It's from this year's Halloween collection. This is easily my favorite from the collection. I just love this polish so much! it's insanely sparkly, and yes it looks like a swamp or something equally gross, but that's the point, It's a Halloween colour! Though I could easily see myself wearing this all year round, it's seriously gorgeous!


It's Alive covered perfectly in 2 coats and was a normal glitter in that it was bumpy and a pain to remove. It's not bad if you use the foil method, but it still left glitter all over my hands after removal.  All this is worth it though, cause look how gorgeous!
To help with the bumpiness I used one coat of Gelous base coat over the glitter, then one coat of seche vite. It's a trick I learned from my friend Traci. Coincidentally I also got this polish from her cause she's awesome like that and will go out of her way to help people out when they can't find something!
If you can still find this, snap it up before It's gone, you won't be disappointed!


Saturday, October 29, 2011

11 Week Manicure Challenge: Week 2

 Hey Guys, Yep, it's week 2 already! lol! since I missed the first week I have 2 back to back for you! 


Since week 2 is inspired by an upcoming holiday, what better holiday to do than Halloween? For this mani I used several pictures from the web to come up with something I liked. My biggest inspiration was Kayla from Nails by Kayla Shevonne. and the other images I found on Google and changed them a bit. I hadn't seen this exact mani done before though, so I apologise if you did it first and I didn't give credit, I just didn't know.

 For the base I used Sally Hansen Green with Envy, for the bride's base I used a dark grey polish mixed with white so it was very light grey, and for everything else I used acrylic craft paint and a small paint brush from Michael's.

I apologise for the dry cuticles, I forgot oil :-( 
Anyways, this is Frankenstein and his bride! I used a dotting tool for the eyes and the brides mouth, but other than that I just used a fine paint brush. The "bolts" on Franks neck are rhinestones.


This was super easy, and really fun, I got a ton of compliments and questions about this. I kept it on for over a week with no chips and only one nail had tip wear!If you do this mani, I want to see! send me a link in the comments so I can check it out!


Tuesday, October 18, 2011

Creepy Pumpkin and a Cuticle Tip

Hey Guys,
Sorry it's been a while, I had a bunch of posts all lined up for a challenge I was doing, then ended up not doing the challenge, so I had nothing to post!
Anyways, on a FB group I am in, a friend of mine posted that her friend had a trick for nasty dry cuticles, and since mine were less than stellar, I decided to try it and document it for you, and I'm happy to say it worked! so thanks Casandra for the tip! (PS check out her blog, she mentions the tip there too!) 
The tip is to use Olive Oil (yes just regular olive oil from your kitchen) and put it all over your cuticles, then wrap your fingers in bandaids and leave it on for an hour or so. I would suggest opening the bandaids before putting the oil on. 
These are my cuticles before, I know you just gasped!  
After the Olive Oil and Band-Aids are on
After the band-aids came off
Quite a difference huh? I left the band-aids on for about an hour and a half, then took them off, washed my hands and applied OPI AvoJuice lotion. Thanks so much for the tip Casandra, that is definitely gonna be a regular treatment here!

Now for my nails! For this mani I used this tutorial from the lovely Asami at Nails by Asami. check her out, she is amazing with the nail art! To do this mani you need nail strips to make the pumpkin face. I used Incoco since that's what is used in the tutorial and I found some on clearance for $2.99.

The polish I used
the completed mani
I love this mani so much it's been on for 5 days! I'm going to take it off today and do it on my toes using an orange glow in the dark polish!